Showing posts with label easy. Show all posts

Monday, 11 November 2013

Mattar Mushroom# Green Peas Mushroom Sabzi

Small tiny white umbrella's are so cute and full for nutrition that it's very hard not to love them. Yes, I am talking about mushrooms. It is nature's super food full with protein, carbohydrate, vitamin D, Iron, immunity booster are few of the nutritional qualities of this nature's gift. There is a wide variety of mushroom available in market with different taste, texture and qualities. In India white button mushrooms are easily available in vegetable market and we all love it in our family.

When in mood B prepares his classic "stuffed mushrooms" as a starter dish for us. Otherwise I often prepare mix veg with mushroom or mattar mushroom. 


Let me share this easy Mattar mushroom recipe.

Ingredients:

  • 200gms white button mushroom
  • 100gms green peas
  • 1 medium chopped onion
  • 2 medium chopped tomatoes
  • 1 tsp ginger garlic paste
  • 1/2 tsp chilli powder
  • 1/2 tsp coriander/dhaniya powder
  • 1/2 tsp Cumin/jeera powder
  • 1/2 tsp turmeric/haldi powder
  • 1/2 tsp garam masala
  • Salt as per taste
  • 2 tsp oil
  • chopped fresh coriander for garnishing.
Step by step instructions for preparing Mattar Mushroom:-

  • Wash mushrooms under flowing water for some time to remove dust and mud particles completely.
  • Chop Mushroom, onion, tomatoes and keep it aside.
  • In a wok/kadhai heat oil.
  • Add chopped onion and cook for some time until they become translucent.
  • Add chopped tomatoes and cook for another 3-4 minutes, until tomatoes are soft and cooked.
  • Add turmeric, salt, chilli, coriander powder, jeera powder, garam masala and mix well.
  • Add green peas and cook for another 3-4 mins.
  • Add chopped mushrooms and mix well. No need to add water as mushrooms leaves water which is enough for cooking all the veggies.
  • Cover  wok with a lid and cook it for another 7-10 minutes.
  • Once water completely evaporates and veggies are completely cooked, turn off the gas.
  • Transfer it to a serving bowl and garnish with fresh chopped coriander.
  • Server with chapati and parantha.


Hope you like it. Do try and share your experience with us.

Happy Cooking!!


Monday, 21 October 2013

Fluffy Soft Eggless PanCake

I have a big list of to-do's and things to try, so here is the latest completed item from things to try.

Couple of months back McDonald's has started their breakfast menu only at few selected stores and this got added in my things to try list as until them I had never taste pancake or was not aware how they even look like.  As McDonald's breakfast menu is being served only between 7 am to 11 am and I can never think of going out of my house so early on a weekend. So B and I waited for a long time and finally I got a chance to had them as by chance we were there early and breakfast menu was still available in McDonalds.

So we ordered  two Mc-egg burgers and one plate hot pancake with maple syrup. First look at pancake made me thought ohh...they are very similar to the "meethe aatte ka puRa" that my mom used to make for us during rainy season with sunf/ fennel seeds. After finding all these similarities I was quite sure in my mind that I want to try it at home. So my search started and ended at Rak's recipe.


Ok, so let's get started :)

Ingredients:
  • 1 cup all purpose flour/ Maida
  • 1 cup milk
  • 1 tsp baking powder
  • 1 Tsp sugar
  • pinch of salt
  • 1 tsp oil
  • Butter and Maple syrup/ Honey for topping


Steps by step instructions for Eggless Pancake:

  • Mix Maida, baking powder, salt, sugar and milk  with a whisk in a deep bowl.
  • Keep it aside for 10 -15 minutes and then give it a quick mix once again.
  • In the mean while heat non stick pan for until it's hot. Once hot turn off the gas and leave  it for 5 minutes.
  • Turn on the heat of non stick pan and set it to Medium.
  • Grease your pan with oil.
  • Now pour one big ladle of batter in the pan and do not spread.
  • Wait until bubbles are gone and pancake changes its color to golden brown. Flip it carefully. You can cover it with a lid for few minutes, this makes pancake extra soft.
  • Let another side get cooked and then transfer it to a serving plate.
  • Serve hot with butter and maple syrup/ honey or syrup of your choice.
  • You can serve cut fruits like banana, apple and any other fruit of your choice along with it.
  • B loved it so much that now he frequently requests pancakes in the morning.
You can make this pancake with atta/ wheat flour, just increase the quantity of milk to get dosa like batter consistency.

I like eating pancake with scrambled egg more than fruits, as now smell problem is gone, but you can make your own choice.


Do share you comments and suggestions and they help me in improving my cooking skills.

Till then happy cooking and healthy living!


Sunday, 14 April 2013

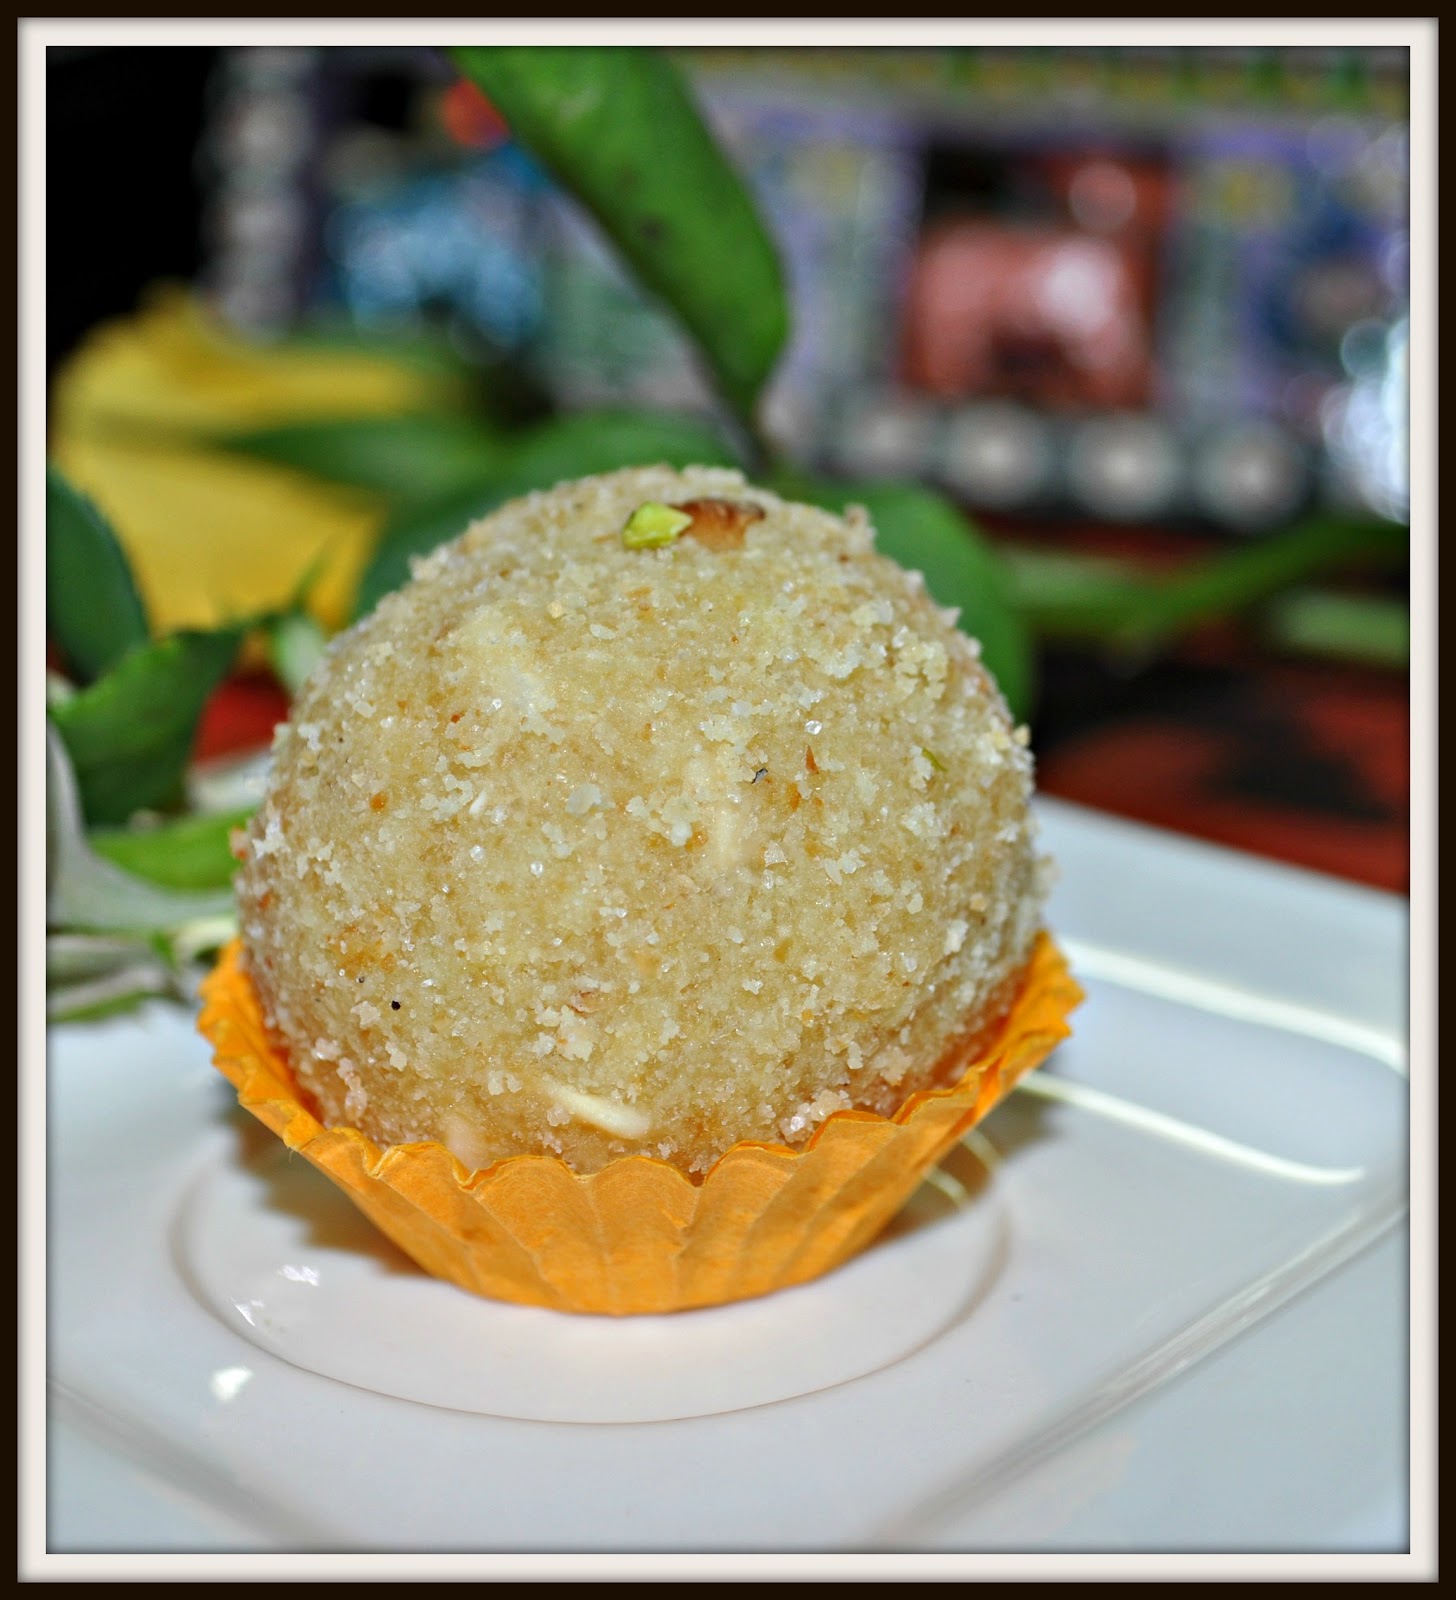
Khoya Sooji Ladoo

For Baisakhi I wanted to prepare some sweets to celebrate this festival. As, I have stopped buying sweets from market for any festival and I wanted to stick to my own policy and rule. By doing this not only I am learning new recipes, but the most important thing is that I am making sure that my family is eating healthy and there is no food adulteration. I want to stop outside food as much as I can.

For this  Baisakhi I prepared Khoya Sooji Ladoo's as they are very easy to prepare in fact you can prepare them in 10 -15 minutes. I found this easy recipe from Preety's Kitchen


So  let's get started and learn how to prepare khoya sooji ladoo at home.

Ingredients:
  • 1 cup Sooji/semolina
  • 1 cup khoya
  • 1 cup powdered sugar
  • 1/2 cup desi ghee
  • 1 tsp eliachi powder
  • 3 tsp chopped cashew nuts, almonds.

Step by step guide to prepare Khoya Sooji Ladoo:
  •  Heat ghee in a pan.
  • Add sooji and fry it until it turns light brown in colour. Remove it in a bowl.
  • Take same pan and fry khoya until it becomes loose and soft.
  • Mix Sooji and khoya in one bowl.Let it cool for some time but do not bring it to room temperature.
  • Add sugar, elaichi, chopped nuts and mix it well.
  • Take fist full mixture in your hand and make round balls from it. You may need to apply some pressure using your hands while making balls.
  • Garnish with pistachio or chopped almonds.
  • You can store then for 7 days in refrigerator.

                                                               Happy Basant Panchami
Note:
  • Do not over fry sooji and khoya.
  • Do not bring mixture to room temperature as it will be difficult to give it make round shape.
  • Do not add sugar when mixture is very hot.


Sending it to participate in zestysouthindiankitchen giveaway and you may like checking out 27coupons .


Happy Cooking and be safe!


Other ladoo recipes:

Besan Ladoo

Monday, 18 March 2013

Maida Matar/ Namkeen Mathari/matthi

Happiness lies in small things. To make me happy you can give me a bowl full of maida matar or namkeen mathari with mango pickle. Few years back, during my home visit, which used  to be every three months from Bangalore to Ambala, I would buy namkeen mathari for office colleagues and for off course for myself from Ambala.  The best thing about mathari/matar is that you can store them in an air tight container for at least 15 days.

When I was very young, every year before Guru Nanak Dev Ji's Birth day in December and before  Guru Gobin Singh ji's Jayanthi in January, sikh community in our locality would start prabhat feri's at least 10 days in advance and would go to different houses in wee hours of the morning. For prasad that we need to give to sangat  my parents and elder sisters would prepare small pink paper packets of balushai and namkeen mathari, so that they can serve it to sangat in the morning along with tea or milk. As prabaht feri goes to a number of houses in the morning and sangat obviously can not eat everything what is offered to them, so this small packet was an easy thing for them to take back home. Since, I have moved to Bangalore, till now  I  haven't got a single chance to see such prabhat feri and I miss it when ever these festivals come.


  Nameekn Mathari

OK, I told you a enough stories about my childhood, lets come to present :). Recently I came to know that B loves maida matar and this is his childhood favorite snack, as my MIL used to prepare it for him. The way to a man's heart is through his tummy :) so I thought why not prepare them at home . By doing this I will be sure about every thing that has been used for making this snack is healthy and of good quality...from flour to oil every thing.

I prepared a small batch of both maida matar and tinny namkeen  mathari as they are just different shapes and you can prepare then using same dough.

So here is the easy 30 minute recipe for madia matar and namkeen mathari:

Ingredients:

  • 2 + 1/2 cup Maida/All purpose flour
  • Salt as per taste
  • 1 tsb carom seeds
  • 4 tsp ghee/dalda/vegetable oil
  • 1/2 cup water
  • Oil for deep drying

                                                           Nameekn Mathari

Step by step process for preparing namkeen matar/mathari:


  • Mix maida, carom seeds, salt, ghee in a bowl.
  • Add very little water at a time and make very stiff dough.  Cover it and keep it aside for 10-15 minutes.
  • NOTE: Use very less water while making dough.
  • Divide this dough in small lemon size balls.
  • Dip one ball in little bit of the oil and roll in round, oval any shape you like using rolling pin. Then cut them in long strips using a knife.
  • For making tinny mathari, make one peanut size ball and press it with your figures tips to give it mathari shape.
  • Heat oil in a kadhai/wok on low heat and start frying matar strips and mathari's on low - medium heat, until they are light brown in color. 
  • NOTE: Be patient and do not be tempted to increase heat to High. Frying process should take 10-15 minutes for each batch to get evenly cooked and crispy matar/ mathari.
  • Take them out on the tissue paper to remove excess oil.
  • let them cool and come to room temperature. You can store them in air tight container and enjoy them with your evening cup of  tea and coffee Try them with mango/lemon pickle, I can assure you that  you will love this combination.
  • Sprinkle little bit chat masala  if you like and this will take it to another level.


                                                                       Maida Matar


Saturday, 2 March 2013

Eggless whole wheat Tutti Frutti Cake

This Valentine B gifted me an Morphy Richards OTG and I am loving it :).This was on my wish list from last one year. Until now I used to bake cake in pressure cooker and was happy with the final outcome, but my OTG is making me even more happier when I am seeing the final outcome. The first thing that I baked in this was an egg-less tutti frutti cake, so that every one in the family can enjoy :) To make this cake extra healthy I used whole wheat flour along with multi purpose flour(maida).


Ingredients:

  • 1 cup wholewheat flour
  • 1 cup multipurpose flour / maida
  • 1 cup milk powder
  • 1 cup powdered sugar
  • 1 cup milk
  • 1 cup refined oil
  • 1 tsp baking powder
  • 1/2tsp bakign soda.
  • 3 tsp colored tutti frutti


Steps by step recipe for Tutti Frutti Cake:

  • Sift wholewheat flour, maida, baking powder and baking soda together thrice.
  • Mix milk, powdered sugar and refined oil well till light.
  • Add mix flour to milk mix in three stages.
  • Take care not to make batter too runny or thin.
  • Add tutti frutti to batter.
  • Note: Dust tutti frutti with little flour before adding it to the batter. So, that it doesn't get settled on the bottom of the cake
  • Grease cake pan with oil and dust some flour to make sure cake comes out easily.
  • Pre-heat the oven to 250 C.
  • Put batter into the prepared cake pan and bake at 180 C for 35 to 40 minutes.
  • Check if cake is ready by inserting a toothpick or knife into the cake. If it comes out clean the cake is done.
  • Remove from the oven and let it cool.
  • Once it's cool down you can easily remove it from the cake pan.
  • Enjoy this soft, crumble cake.


Happy Cooking!


Thursday, 7 February 2013

Idli Using Idli Rava

No, more idli batter shopping from market to get soft idli, as now I can prepare my own super soft idli batter at home.. isn't it nice :)

I am big fan of Idli and would like to prepare it at home almost every week. I have tried making idli with normal rice, but they were not so soft and that's why my search was still on for soft idli.  Last week while doing my search on internet I came across Pratibhas's blog and found this easy recipe using idli rava. I have made changes here and there but idli's were yummy softlucious .. :)


I have to admit I had lots of apprehensions in mind, as I had never prepared idli using idli rava. but there will be first time for every thing... so it was for idli rava :)

Ingredients:

2 1/2 cup Idli rava
1 cup Urad dal
1/2 cup Poha/Flatten rice
1/2tsp methi dana/ fenugreek seeds
Salt to taste
3 cup water for grinding and steaming

Preparation for Idli Batter:
  • Soak urad dal and fenugreek seeds for 3-4 hours.
  • Soak idli rava and poha for 2 hours. Rava drinks lots of water in comparison to rice.
  • Drain excess water from urad dal and fenugreek mix and grind it to smooth paste using very little water.
  • Drain excess water from idli rava and poha mix and grind it for another 5 mins alog with urad dal paste. Add little water if required to get smooth thick paste.
   Note :You will need to squeeze excess water from rava using your hands, otherwise it will be very watery.
  • Take out this batter in deep vessel and cover it with a lid . Leave it for next 8-9 hours for fermenting. I kept it overnight as I was preparing idli's next day morning. Batter will be almost double in size after fermenting.


Idli Preparation:
  • Add little water if idli batter is too thick and mix well.
  • Add salt to batter.
  • Grease idli mould/plate and pour 3/4 of batter in each module. 
  • Take 2 cups of water in pressure cooker .
  • Place idli modules in pressure cooker without whistle (weight). Make sure you have removed whistle from the pressure cooker /
  • Let it cook on medium - high flame for next 10 -12 mins.
  • Dip spoon in water to remove idli from each mould.
  • Server hot idli with sambhar and tomato chutney.


Note
: Idli rava is different than normal rava/ soji that we use for making rava idli,but  you can easily find it in any shop in south India, not sure of northern parts of India.