Monday, 21 October 2013

Fluffy Soft Eggless PanCake

I have a big list of to-do's and things to try, so here is the latest completed item from things to try.

Couple of months back McDonald's has started their breakfast menu only at few selected stores and this got added in my things to try list as until them I had never taste pancake or was not aware how they even look like.  As McDonald's breakfast menu is being served only between 7 am to 11 am and I can never think of going out of my house so early on a weekend. So B and I waited for a long time and finally I got a chance to had them as by chance we were there early and breakfast menu was still available in McDonalds.

So we ordered  two Mc-egg burgers and one plate hot pancake with maple syrup. First look at pancake made me thought ohh...they are very similar to the "meethe aatte ka puRa" that my mom used to make for us during rainy season with sunf/ fennel seeds. After finding all these similarities I was quite sure in my mind that I want to try it at home. So my search started and ended at Rak's recipe.


Ok, so let's get started :)

Ingredients:
  • 1 cup all purpose flour/ Maida
  • 1 cup milk
  • 1 tsp baking powder
  • 1 Tsp sugar
  • pinch of salt
  • 1 tsp oil
  • Butter and Maple syrup/ Honey for topping


Steps by step instructions for Eggless Pancake:

  • Mix Maida, baking powder, salt, sugar and milk  with a whisk in a deep bowl.
  • Keep it aside for 10 -15 minutes and then give it a quick mix once again.
  • In the mean while heat non stick pan for until it's hot. Once hot turn off the gas and leave  it for 5 minutes.
  • Turn on the heat of non stick pan and set it to Medium.
  • Grease your pan with oil.
  • Now pour one big ladle of batter in the pan and do not spread.
  • Wait until bubbles are gone and pancake changes its color to golden brown. Flip it carefully. You can cover it with a lid for few minutes, this makes pancake extra soft.
  • Let another side get cooked and then transfer it to a serving plate.
  • Serve hot with butter and maple syrup/ honey or syrup of your choice.
  • You can serve cut fruits like banana, apple and any other fruit of your choice along with it.
  • B loved it so much that now he frequently requests pancakes in the morning.
You can make this pancake with atta/ wheat flour, just increase the quantity of milk to get dosa like batter consistency.

I like eating pancake with scrambled egg more than fruits, as now smell problem is gone, but you can make your own choice.


Do share you comments and suggestions and they help me in improving my cooking skills.

Till then happy cooking and healthy living!


Saturday, 21 September 2013

Choco Chip Chocolate Cake # Chocolate Cake

Happiness is in small things, how true this statement is :)

I do not remember having any B'day party with friends on my birthday. But my Dad use to make sure that we as a family celebrate this day as a very special day among immediate family members. He will bring home all the food items that we request him, while coming from office, such as pastry, chips, snack, sweets, ice cream, cold drinks, yes cold drink as it was not common those days :0  But yes, no going to Restaurant or calling neighbors for B'day or give and take of B'day gift business. B'days were special small family affair and still are in our house :).

Today is my eldest sis B'day and from last few days debt was going in my mind, what to bake on this special day?? a cake or cookies. And I finally decided that what could be better than a cake specially for her. I know I can not share even a single piece with her becoz of the physical distance, but still sharing it with through this virtual world and through  my thoughts as there is no distance that way :)

Happy Birth Day Di!


Ingredients:

- 50 gm butter at room temperature.
- 1/3 cup powdered sugar
- 1 cup all purpose flour (APF)/Maida
- 2 eggs
- few drops of vanilla essence.
-  1/2 cup choco chips optional
- 3 TSP chocolate powder
- 1 tsp baking powder
- 5 Tsp milk


Step by step guide for preparing Choco Chip Chocolate Cake:-

- Sieve APF , chocolate powder , baking powder well and keep it aside.
- In a bowl mix butter, powered sugar until it becomes creamy.
- Add few drops of vanilla essence.
- Add 2 eggs, yes with yellow yolk :) and mix it well until fluffy.
- Now slowly add sieved flour and mix it well.
- Add little by little milk if cake batter is too thick.
- Apply butter on a bake pan and sprinkle some flour, by doing this cake will come out easily from the pan.
- Transfer cake mix to the baking pan.
- Preheat oven at 170 C.
- Bake it at 170 C for 30-35 minutes.
-  Once baked test it by inserting one toothpick and if it comes out clean it means cake is baked completely.
- Let it stand and cool.
- Once it comes on room temperature cake will come out easily from the pan.
- Cut it into pieces and celebrate the occasion :)
- It's soft and moist and perfect for the occasion.
Isn't it easy and simple :)


Happy occasions!, happy cooking.


Coriander Mint Chutney # Dhaniya Pudina Chutney # Indian Dip # Green Chutney

Coriander chutney often called as Dhaniya Pudina chutney or Green chutney is very common dip often used to compliment evening snacks in India. My elder sisters and Mom use to prepare it to very often.

It is so easy, simple and can be prepared in couple of minutes. For some reason I am not a big fan of tomato ketchup and coriander mint chutney is one of my favorite :)


Ingredients:

- 1 cup washed and chopped Coriander leaves
- 1/2 cup chopped mint leaves
- small piece of ginger
- salt as per taste
- 1 tsp dry mango powder/ raw mango it you can get
- 1 green chilli
- 1 small chopped Onion.
- 1 tsp anaar dana - Optional
- 3-4 walnut pieces - Optional
- Water very little

Steps to prepare Coriander Mint Chutney

- Add every thing to the Mixer/Pulse.
- Add very little water or only when you are not able to grind it without that.
- Grind it well and you will get a thick paste.
- Chutney is ready.
- Transfer it to a clean and dry bowl. You can keep it refrigerated for 3-4 days.
- Server it with Pakora, Sandwich, Parantha or even Dosa, anything you like.

Happy cooking :)


Thursday, 6 June 2013

Quick and simple Bhel : 10 minute bhel

I was craving for some thing hot and spicy the moment, I started from home after work and was debating in my mind what will I cook or eat to satisfy this evening hunger. And to my relief , the moment  I reached home I saw this pack of puffed rice sitting on breakfast table . I knew it then and there what I am going to eat and enjoy this lovely Bangalore weather.

I prepared a hot cup of strong  tea to compliment this chat pat bhel to satisfy my hunger.


Here is the quick recipe:-


Serves: 1 person, increase ingredient proportion if you are making it for more people.

1 cup puff rice
1 small chopped onion
1 small copped green chilly
Salt as per taste
1 tsp chopped coriander
1 tsp lemon juice
2 tsp  zero number sev/ nameek / I used MTR namkeen

Optional/ Good to have :)
2-3 drops of mustard oil.
1 tsp boondi
1 tsp corn flakes ( use any type flavored sweet or plain)
1 tsp lemon juice.
1 tsp tomato
1 tsp roasted groundnut
Add any other nameek/ mixture/ vegetables like chopped cucumber, grated carrot if  you want. You can play with it as per your taste and interest.

Procedure:

-Mix all ingredients in a bowl.
-Add lemon juice
-Garnish with chopped coriander.

This helps to control quick hunger. experiment with it as per your taste and you will love it.

Happy cooking and enjoy namma Bangalore weather.


Wednesday, 22 May 2013

Starter / Snack: Potato Cheese Ball

Fried snacks never fail in attracting me towards them. During one of our team lunch, I had these jalapeno cheese balls at Prost ( new restaurant in Kormangala). They were crispy from outside with melting cheese inside them...  mmmm...  it was yumm.

I wanted to try them at home and got the chance in the same week, as my younger sister was coming to our home. So, I did all the preparations in advance, so that I can spend more time with her and less in kitchen... sister's talk a lot .. you know.. :). I prepared same for evening snacks for kids during my home visit and it was an instant hit at home. I think all kids love potato and are never conscious or afraid of gaining weight.Love childhood!

Sorry, I do not have nay picture as before camera is ready to say cheese these cheese balls get disappear.

Ingredients:

  • 6-7 boiled potatoes
  • 5-6 white/brown bread slices
  • Grated mozrella/ cheddar cheese
  • salt as per taste
  • 2 tsp chopped coriander( optional)
  • 4 tsp sweet corns (optional)
  • Oil for deep frying.


Step by step process:

  • Take boiled potatoes, add bread slices in a bowl and mash them properly.
  • Add salt as per taste and mix it well.
  • Divide potato mix in equal portions and make small balls.
  • Make a small hole in the potato ball and add some grated cheese.
  • Roll it once again to make sure cheese is not coming out.
  • Let them cool for an hour in refrigerator.
  • Heat oil for deep frying.
  • Deep fry until light brown and crispy.
  • Serve them with cheese dip or mint chutney.

Note:
  • Roll potato ball in bread crumbs before frying this will make this extra crispy. 
  • You can add boiled veggies like carrot, beans or sweet corn in the potato mix.

You can serve them as starter or enjoy them as evening snack with evening cup of tea. Also, you can make them in advance and can deep fry these potato cheese balls when your guests arrive. By doing this you not only save time  but get plenty of time to spend with your lovely guests and family during those special moments.

Keep cooking and enjoy life!


Sunday, 14 April 2013

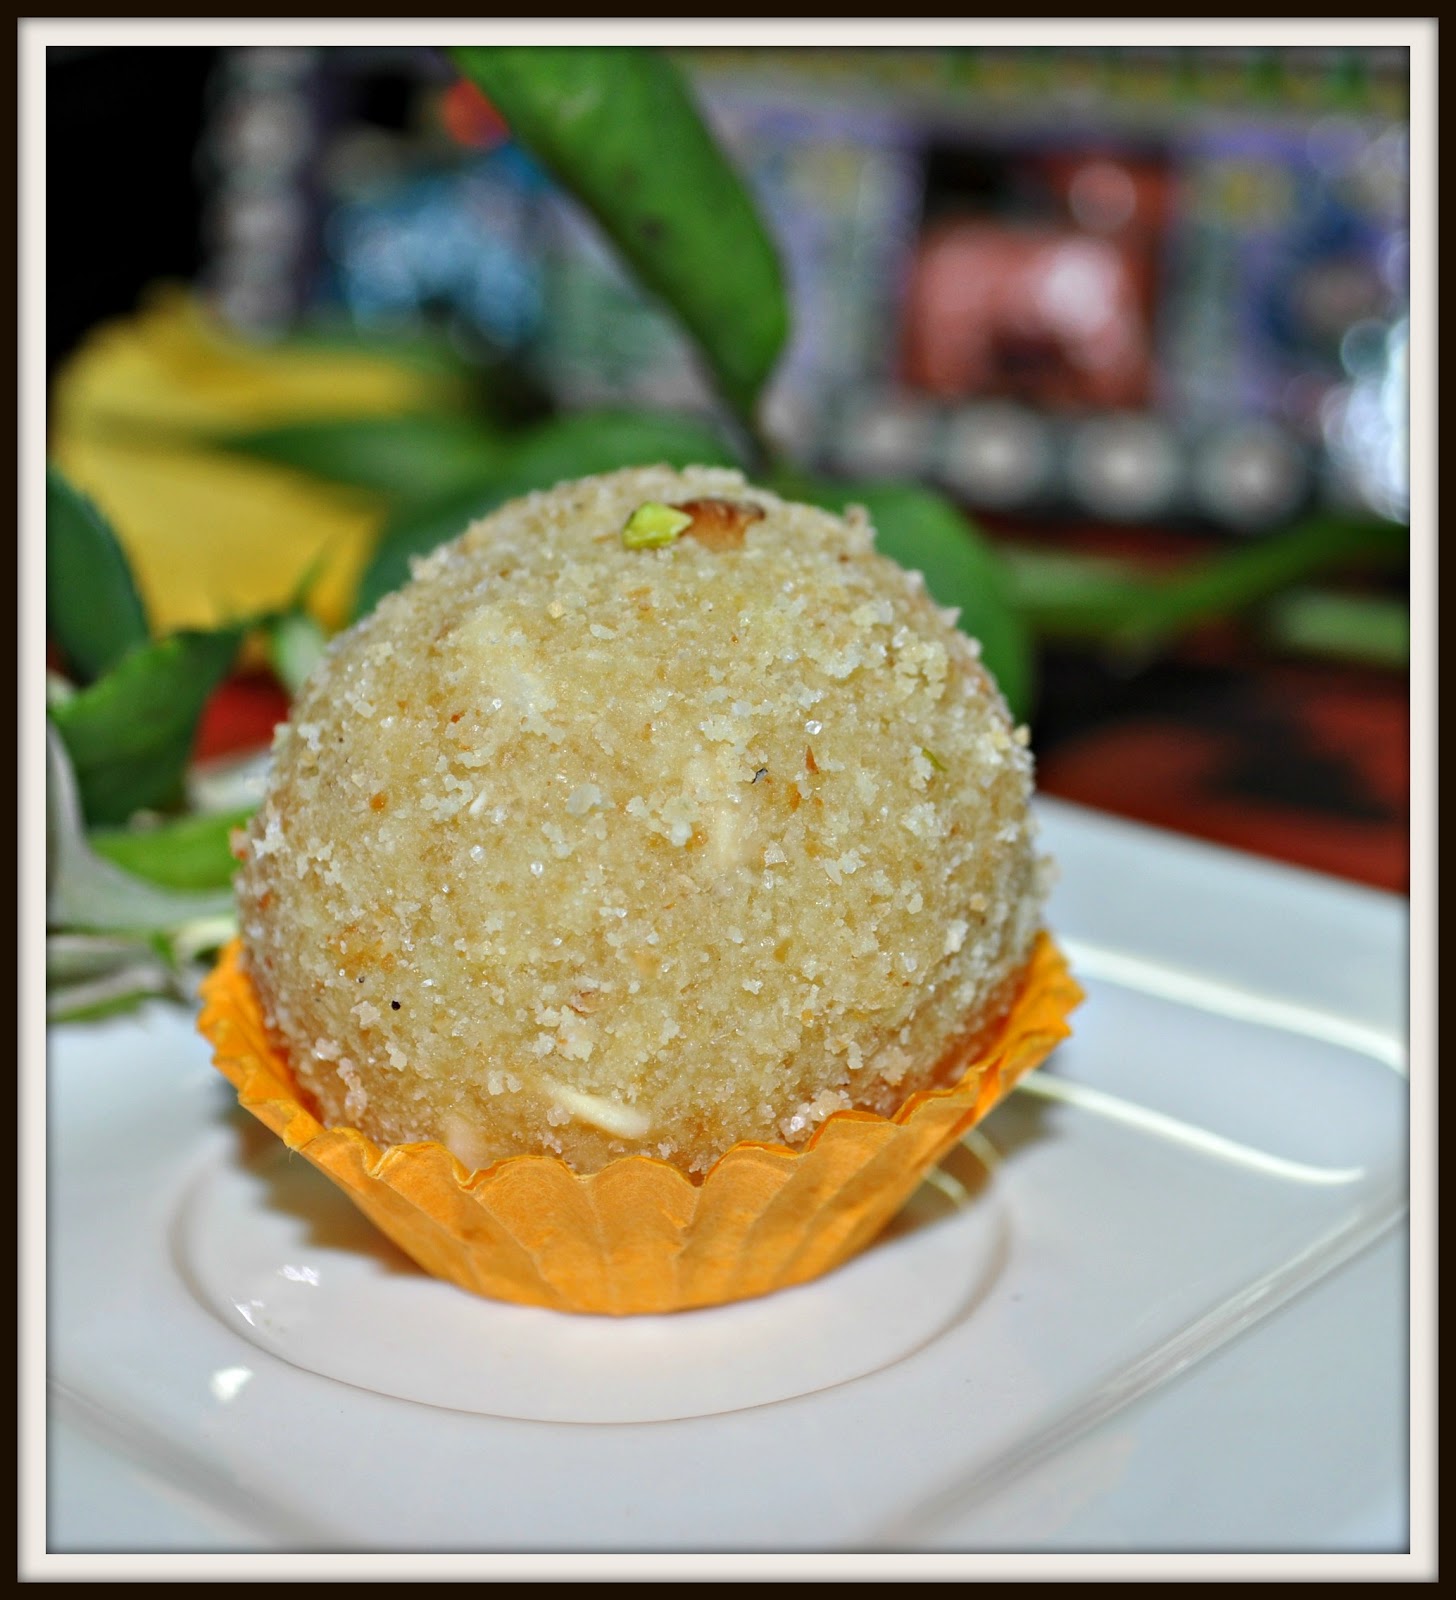
Khoya Sooji Ladoo

For Baisakhi I wanted to prepare some sweets to celebrate this festival. As, I have stopped buying sweets from market for any festival and I wanted to stick to my own policy and rule. By doing this not only I am learning new recipes, but the most important thing is that I am making sure that my family is eating healthy and there is no food adulteration. I want to stop outside food as much as I can.

For this  Baisakhi I prepared Khoya Sooji Ladoo's as they are very easy to prepare in fact you can prepare them in 10 -15 minutes. I found this easy recipe from Preety's Kitchen


So  let's get started and learn how to prepare khoya sooji ladoo at home.

Ingredients:
  • 1 cup Sooji/semolina
  • 1 cup khoya
  • 1 cup powdered sugar
  • 1/2 cup desi ghee
  • 1 tsp eliachi powder
  • 3 tsp chopped cashew nuts, almonds.

Step by step guide to prepare Khoya Sooji Ladoo:
  •  Heat ghee in a pan.
  • Add sooji and fry it until it turns light brown in colour. Remove it in a bowl.
  • Take same pan and fry khoya until it becomes loose and soft.
  • Mix Sooji and khoya in one bowl.Let it cool for some time but do not bring it to room temperature.
  • Add sugar, elaichi, chopped nuts and mix it well.
  • Take fist full mixture in your hand and make round balls from it. You may need to apply some pressure using your hands while making balls.
  • Garnish with pistachio or chopped almonds.
  • You can store then for 7 days in refrigerator.

                                                               Happy Basant Panchami
Note:
  • Do not over fry sooji and khoya.
  • Do not bring mixture to room temperature as it will be difficult to give it make round shape.
  • Do not add sugar when mixture is very hot.


Sending it to participate in zestysouthindiankitchen giveaway and you may like checking out 27coupons .


Happy Cooking and be safe!


Other ladoo recipes:

Besan Ladoo

Monday, 18 March 2013

Maida Matar/ Namkeen Mathari/matthi

Happiness lies in small things. To make me happy you can give me a bowl full of maida matar or namkeen mathari with mango pickle. Few years back, during my home visit, which used  to be every three months from Bangalore to Ambala, I would buy namkeen mathari for office colleagues and for off course for myself from Ambala.  The best thing about mathari/matar is that you can store them in an air tight container for at least 15 days.

When I was very young, every year before Guru Nanak Dev Ji's Birth day in December and before  Guru Gobin Singh ji's Jayanthi in January, sikh community in our locality would start prabhat feri's at least 10 days in advance and would go to different houses in wee hours of the morning. For prasad that we need to give to sangat  my parents and elder sisters would prepare small pink paper packets of balushai and namkeen mathari, so that they can serve it to sangat in the morning along with tea or milk. As prabaht feri goes to a number of houses in the morning and sangat obviously can not eat everything what is offered to them, so this small packet was an easy thing for them to take back home. Since, I have moved to Bangalore, till now  I  haven't got a single chance to see such prabhat feri and I miss it when ever these festivals come.


  Nameekn Mathari

OK, I told you a enough stories about my childhood, lets come to present :). Recently I came to know that B loves maida matar and this is his childhood favorite snack, as my MIL used to prepare it for him. The way to a man's heart is through his tummy :) so I thought why not prepare them at home . By doing this I will be sure about every thing that has been used for making this snack is healthy and of good quality...from flour to oil every thing.

I prepared a small batch of both maida matar and tinny namkeen  mathari as they are just different shapes and you can prepare then using same dough.

So here is the easy 30 minute recipe for madia matar and namkeen mathari:

Ingredients:

  • 2 + 1/2 cup Maida/All purpose flour
  • Salt as per taste
  • 1 tsb carom seeds
  • 4 tsp ghee/dalda/vegetable oil
  • 1/2 cup water
  • Oil for deep drying

                                                           Nameekn Mathari

Step by step process for preparing namkeen matar/mathari:


  • Mix maida, carom seeds, salt, ghee in a bowl.
  • Add very little water at a time and make very stiff dough.  Cover it and keep it aside for 10-15 minutes.
  • NOTE: Use very less water while making dough.
  • Divide this dough in small lemon size balls.
  • Dip one ball in little bit of the oil and roll in round, oval any shape you like using rolling pin. Then cut them in long strips using a knife.
  • For making tinny mathari, make one peanut size ball and press it with your figures tips to give it mathari shape.
  • Heat oil in a kadhai/wok on low heat and start frying matar strips and mathari's on low - medium heat, until they are light brown in color. 
  • NOTE: Be patient and do not be tempted to increase heat to High. Frying process should take 10-15 minutes for each batch to get evenly cooked and crispy matar/ mathari.
  • Take them out on the tissue paper to remove excess oil.
  • let them cool and come to room temperature. You can store them in air tight container and enjoy them with your evening cup of  tea and coffee Try them with mango/lemon pickle, I can assure you that  you will love this combination.
  • Sprinkle little bit chat masala  if you like and this will take it to another level.


                                                                       Maida Matar